My HFS-formatted drive stopped mounting, and I don’t have a backup of the files on it. I’m trying to figure out the safest way to recover data from an HFS drive without making things worse. Has anyone had success with reliable Mac data recovery tools or recovery services?
First thing: stop using the drive for now. Don’t copy anything to it, don’t reformat it, and don’t keep trying random fixes. With HFS and HFS+ drives, deleted files are often still sitting there until new data overwrites them, so the less you touch the disk, the better.
Before jumping into recovery software, check whether the drive itself seems healthy. Open Disk Utility and see if the drive shows up there. If it’s external, try a different USB cable or another port just to rule out something simple. If the enclosure or adapter lets you check SMART status, look at that too. Bad sectors or health warnings change the situation from “deleted files” to “possibly failing drive.”
If the drive is acting weird, like randomly disconnecting, crawling during reads, or making your Mac hang, don’t keep scanning it over and over. In that case, making a disk image first is usually safer, assuming the drive is readable enough to do it. That gives you something to work from if the hardware gets worse.
Recovery software worth trying
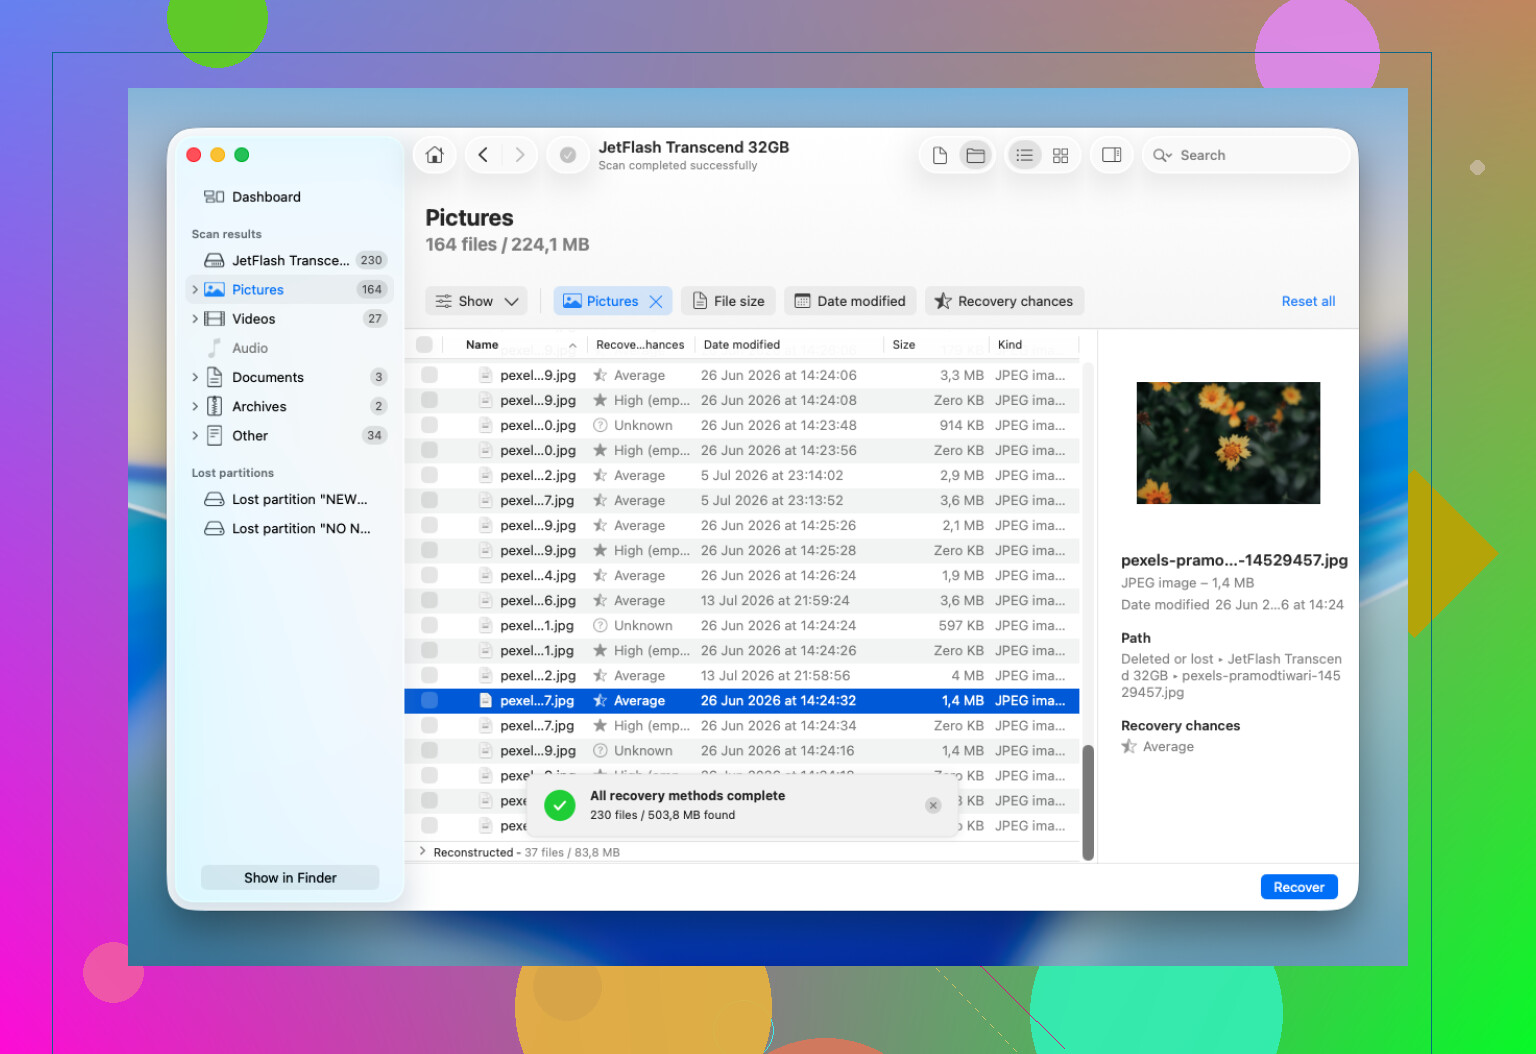
For HFS and HFS+ recovery, I usually point people toward Disk Drill. It’s fairly easy to use, handles HFS volumes well, and can sometimes scan a disk even when Finder won’t mount it, as long as Disk Utility still sees the device.
The basic flow is simple:
- Install Disk Drill somewhere other than the drive you’re trying to recover from.
- Choose the HFS or HFS+ drive in the app.
- Use Search for Lost Data. For most external drives, Universal Scan makes the most sense.
- Let the scan finish instead of stopping it halfway.
- Preview the important files if possible.
- Recover them to a different healthy drive, not back to the original one.
Emptying the Trash doesn’t automatically mean the files are gone forever. Same with a quick format. A lot of the time, the file entries are removed or reset, but the actual data may still be on the disk until something new overwrites it. That’s why continuing to use the drive is the thing that can really hurt your chances.
Also, if you have a Time Machine backup, check that first. Restoring from a backup is cleaner, safer, and usually much less annoying than doing file recovery.
When to stop trying it yourself
I’d be careful if the drive clicks, buzzes, grinds, disappears from Disk Utility, disconnects constantly, freezes the Mac when plugged in, or causes recovery software to fail because of read errors. Those are usually signs of hardware trouble, not just file system damage.
At that point, more scans can make things worse. If the files are important enough, a professional recovery lab is the safer route.
If the drive still shows up normally and doesn’t seem physically damaged, though, accidental deletion or file system issues are often recoverable. Try recovery software before doing anything that writes changes to the disk.
9 Likes
If the drive is only failing to mount but still appears with the correct size in Disk Utility, I’d treat it as a recovery job first and a repair job second. A lot of people click First Aid right away because it feels harmless, but file system repair can write changes to the volume. Sometimes that fixes it, sometimes it “cleans up” the exact directory damage that recovery tools could have used.
I agree with @mikeappsreviewer on not scanning a flaky disk repeatedly, but I’d be even more conservative if the files matter. Make a byte-for-byte image or clone to another drive if you can, then scan the copy. If you’re comfortable with command-line tools, ddrescue is often used for that because it handles read errors better than a normal copy. If that sounds like too much, then at least use recovery software in read-only mode and save recovered files somewhere completely separate.
Disk Drill is fine to try if the disk is stable and visible to the system, especially if you want a GUI and file previews before paying or committing to a recovery. Just don’t let any tool “repair,” “rebuild,” or “initialize” the original disk until you’ve pulled off what you can. The annoying part is that a mount failure can be either a small catalog issue or the start of hardware failure, and the safest workflow is slower than the tempting one-click fix.
A drive that won’t mount is not the same as a deleted-files recovery. That distinction matters because some advice that works fine for “I emptied the Trash” is risky when the volume structure itself is damaged.
If Finder can’t mount it, I would not spend much time trying to browse it, force-mount it, or run little “fix” commands just to see what happens. The first win is getting a stable copy of the whole device, even if the file system inside that copy is still broken. After that, you can be much more aggressive because you’re no longer poking the only copy of your data.
The annoying catch is that macOS may try to be helpful. If you plug the drive in and get a message like “initialize,” “repair,” or “this disk is not readable,” do not accept anything that sounds like it will prepare the disk for use. Ignore is usually the safer choice while you decide what to do next. Ejecting is fine if you are stopping for now, but don’t initialize it.
I’d separate the cases like this:
If the drive shows the correct capacity, does not click, does not disconnect, and reads at a normal-ish speed, then software recovery is reasonable. Disk Drill, R-Studio, DMDE, UFS Explorer, etc. may all be able to scan it. The important part is not the brand first, it is the workflow: scan the original only if you have to, recover to a different disk, and don’t let the tool “fix” the original volume.
If the drive is slow, makes the Mac beachball, drops offline, or keeps throwing I/O errors, skip the pretty recovery scan for now. Those scans can run for hours and hammer the weakest parts of the disk. In that situation, imaging with something that tolerates bad reads is the better first move. ddrescue is popular because it can skip bad areas, come back later, and keep a log of what it already copied. A normal Finder copy is terrible for this because it gets stuck and gives up.
Another expectation to set: even if recovery works, you may not get the neat folder tree back. HFS/HFS+ relies heavily on its catalog structures. If those are damaged, a recovery app might find the file contents but lose original names, folders, dates, or some package structure. Photos, videos, PDFs, and simple documents often recover more cleanly than app libraries, mail stores, Photos libraries, or projects made of thousands of small linked files.
If this is an external drive, I’d remove one variable before doing anything big. Try a known-good cable and a direct port, not a hub. If it is a bare SATA drive in a USB enclosure, the enclosure can be the problem. A failing bridge board can make a healthy disk look like garbage. That does not mean keep testing forever, but one controlled cable/enclosure swap is different from repeatedly running repair attempts.
My personal order would be:
- Stop trying to mount it in Finder.
- Confirm Disk Utility sees the physical device and reports the expected size.
- If the data is worth real money, go to a lab before experimenting.
- If DIY is acceptable, make an image/clone to a healthy drive with enough space.
- Scan the image or clone with recovery software.
- Save recovered files to a third drive or your internal drive, never back to the bad one.
- Only after recovery, consider First Aid, reformatting, or replacing the drive.
Disk Drill is fine as a first GUI attempt if the disk is stable, especially because previews are useful before you commit to recovering a pile of junk. I just wouldn’t treat any recovery app as magic. If the hardware is failing, the safest software is still unsafe if it keeps forcing reads from a dying disk for twelve hours.
The big “don’t do this” items are: don’t initialize, don’t erase, don’t run First Aid before recovery, don’t install recovery software onto the affected drive, and don’t recover files back to the same volume. Those mistakes are boring, common, and often worse than the original mount failure.
Whether the HFS volume was encrypted changes the odds a lot. If it was, recovery tools like Disk Drill still need the password and enough intact volume metadata to make sense of the files, so cloning first matters even more. The imaging-first advice above is right, but don’t assume a raw file scan will save you if the encryption wrapper is damaged.