I’ve been experimenting with AI headshot tools to see if they can make me look like a realistic movie character for social media profiles and a cosplay project. So far, the results look cool but not quite like what I imagined from actual film characters. I’m looking for advice on which AI apps, prompts, or settings work best for achieving a cinematic, movie-style look that still resembles my real face.
For a while, looking like a movie character meant you had to know a photographer, borrow or rent outfits, stand under hot lights, then wait while someone edited your face in Lightroom for hours. I tried that once. Expensive, awkward, and I used one picture in the end.
Now it is starting to feel silly, because AI headshot tools let you get something close from a few selfies on your couch.
What these apps do is take your regular photos and rebuild a version of your face, then drop that into different “cinematic” setups. Think strong shadows, controlled highlights, film-like color, specific genres, that kind of thing. The important detail, at least for me, is that your face stays your face, instead of being pasted on a random template.
People I know use these AI shots for:
- Social profiles where they want to look more intentional, not like a Zoom screenshot.
- Personal branding, especially if they work in creative or tech roles.
- Storytelling stuff, like moodboards, DnD characters, visual backstories, fanfic covers.
I ended up trying a bunch of these, and two apps stuck with me: Eltima AI Headshot Generator and MoMo. They feel similar on the surface, but the output is pretty different.
Eltima AI Headshot Generator – how it works when you actually use it
App Store link:
I tried Eltima AI Headshot Generator first on a half-baked hunch after seeing it linked in a thread. The flow was simple enough that I did it half-asleep on my phone.
Here is what I did:
-
Uploaded 3 selfies.
No makeup, no special outfit. -
Let the app train on my face.
It took a bit, nothing wild. It builds a face model so it stops treating each selfie as a separate person. -
Picked a style pack.
This is where it gets interesting. You are not picking “filters” in the Instagram sense, you are picking entire visual directions.
The app has these conceptual packs that feel more intentional than “add bokeh and blur.” Some examples from what I saw:
-
Noir and mystery styles
• Strong contrast, deep shadows on half the face.
• Slight grain, lower saturation.
• Looks like those slow-burn crime movies. -
Atmospheric and story-driven packs
• Softer light, muted colors, more mood than “wow” factor.
• These look similar to a film still where the character is mid-thought. -
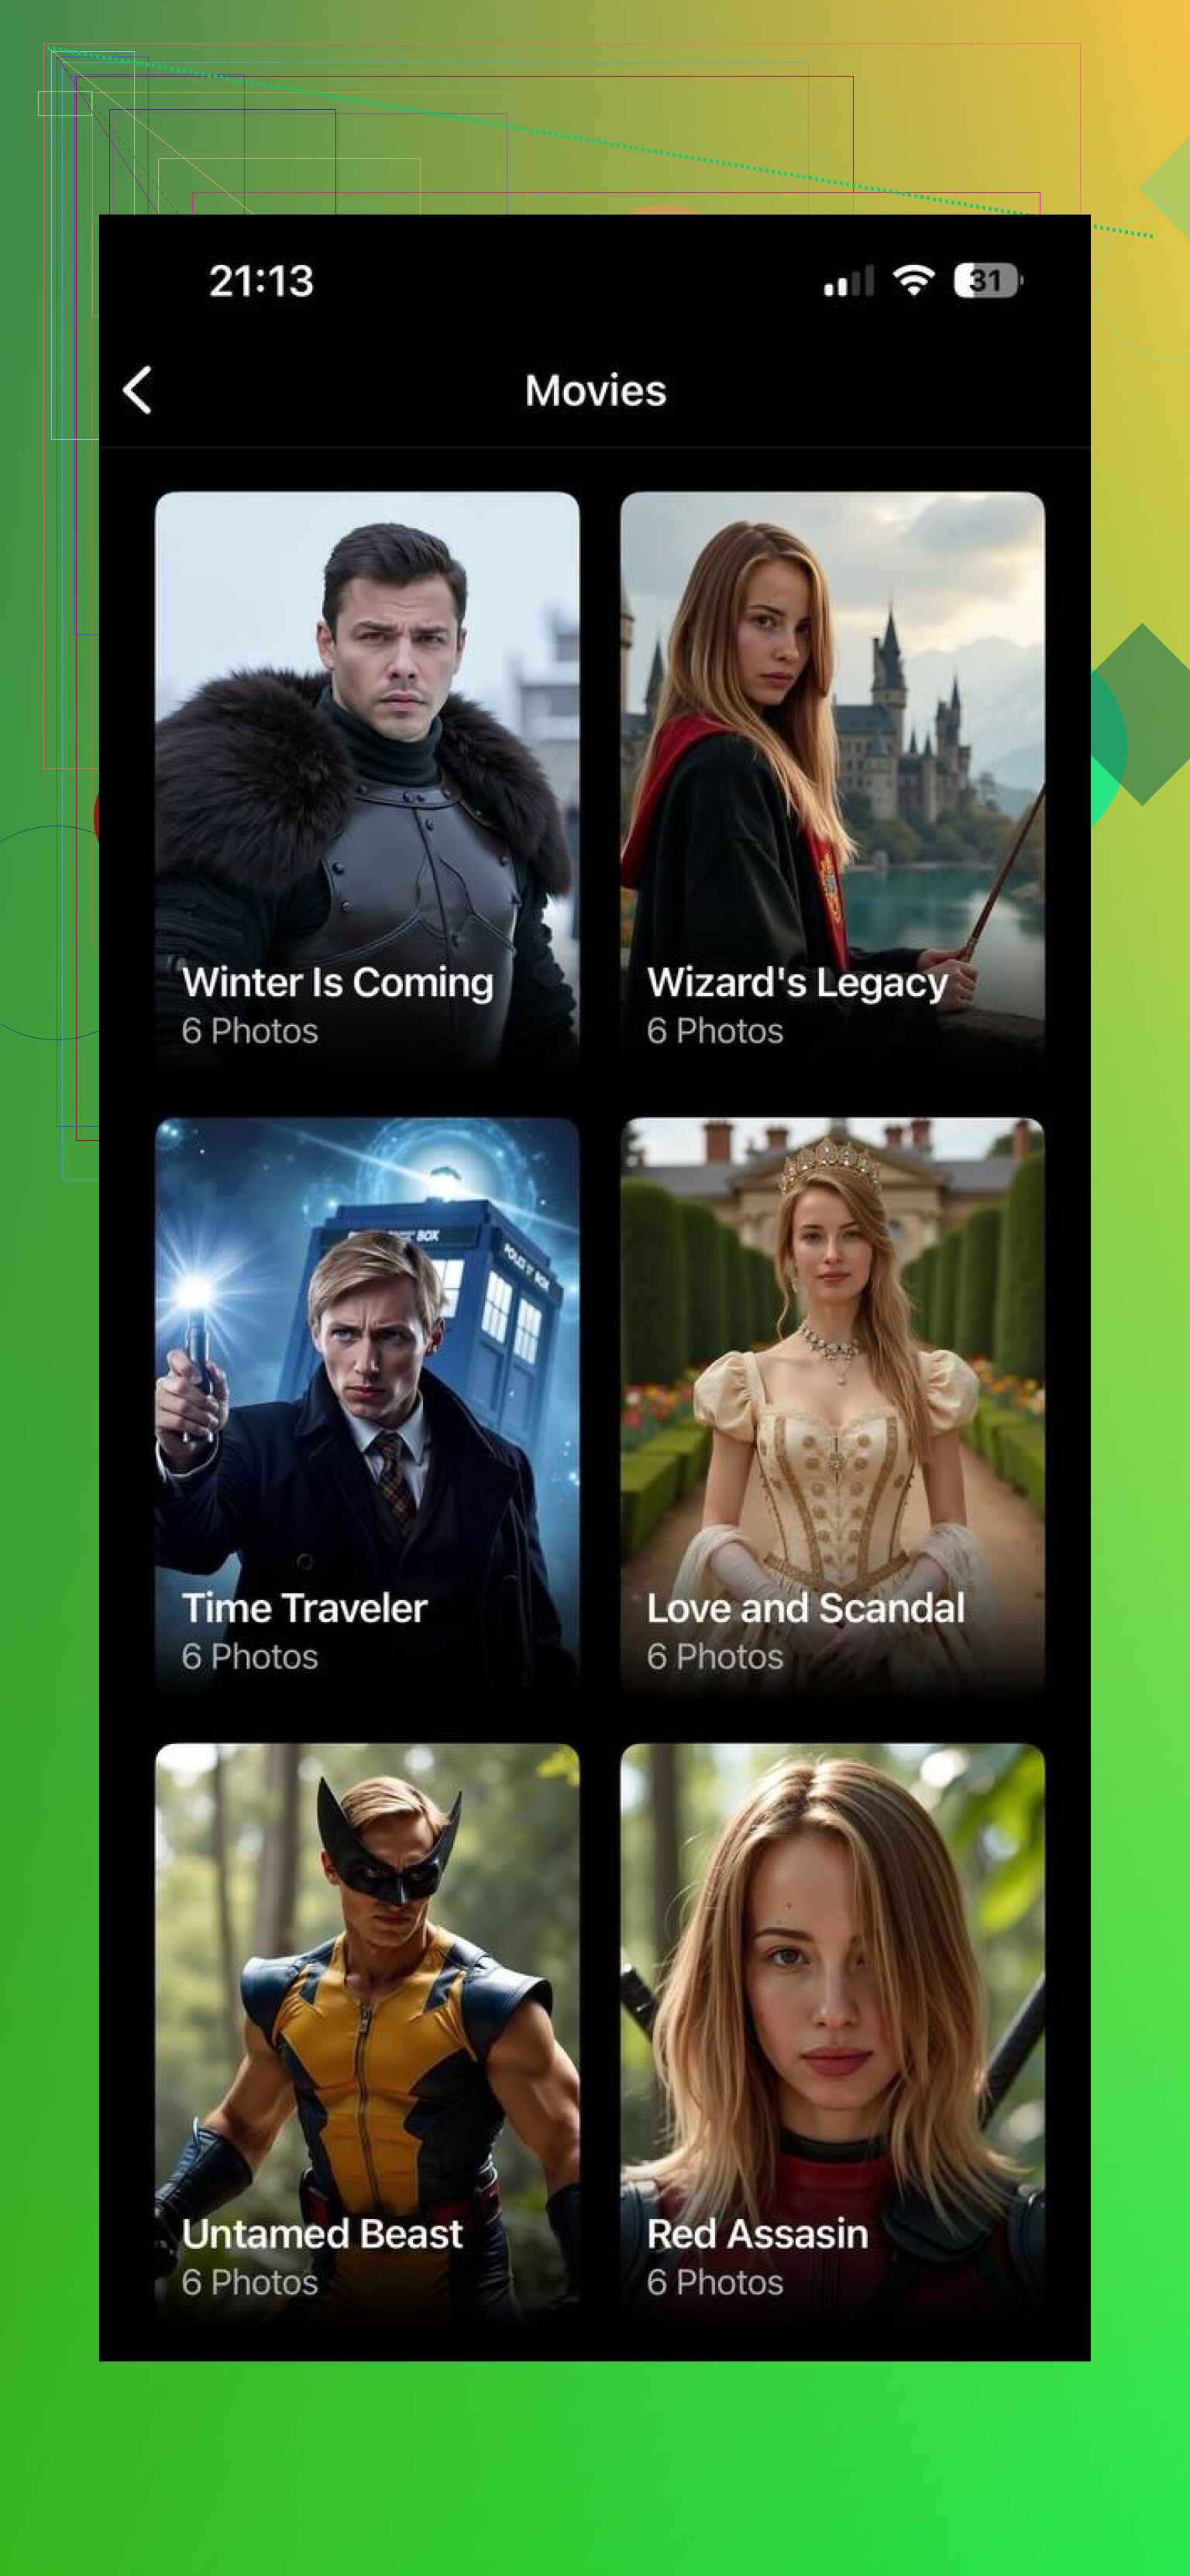
A Movie pack with genre looks
• Different film genres and character archetypes.
• You get stuff that reads like “spy thriller,” “indie drama,” “sci-fi lead” without shouting it.
Result on my side: it still looked like me. Same nose, same eye distance, same slight asymmetry. Pores did not look plastic. My friends recognized me instantly and did not ask “what filter is this,” they asked “where did you take this photo.”
That was the nice part. It felt less like “face edited for Instagram” and more like some DP framed a shot around my face.
Here are example images from the original post:
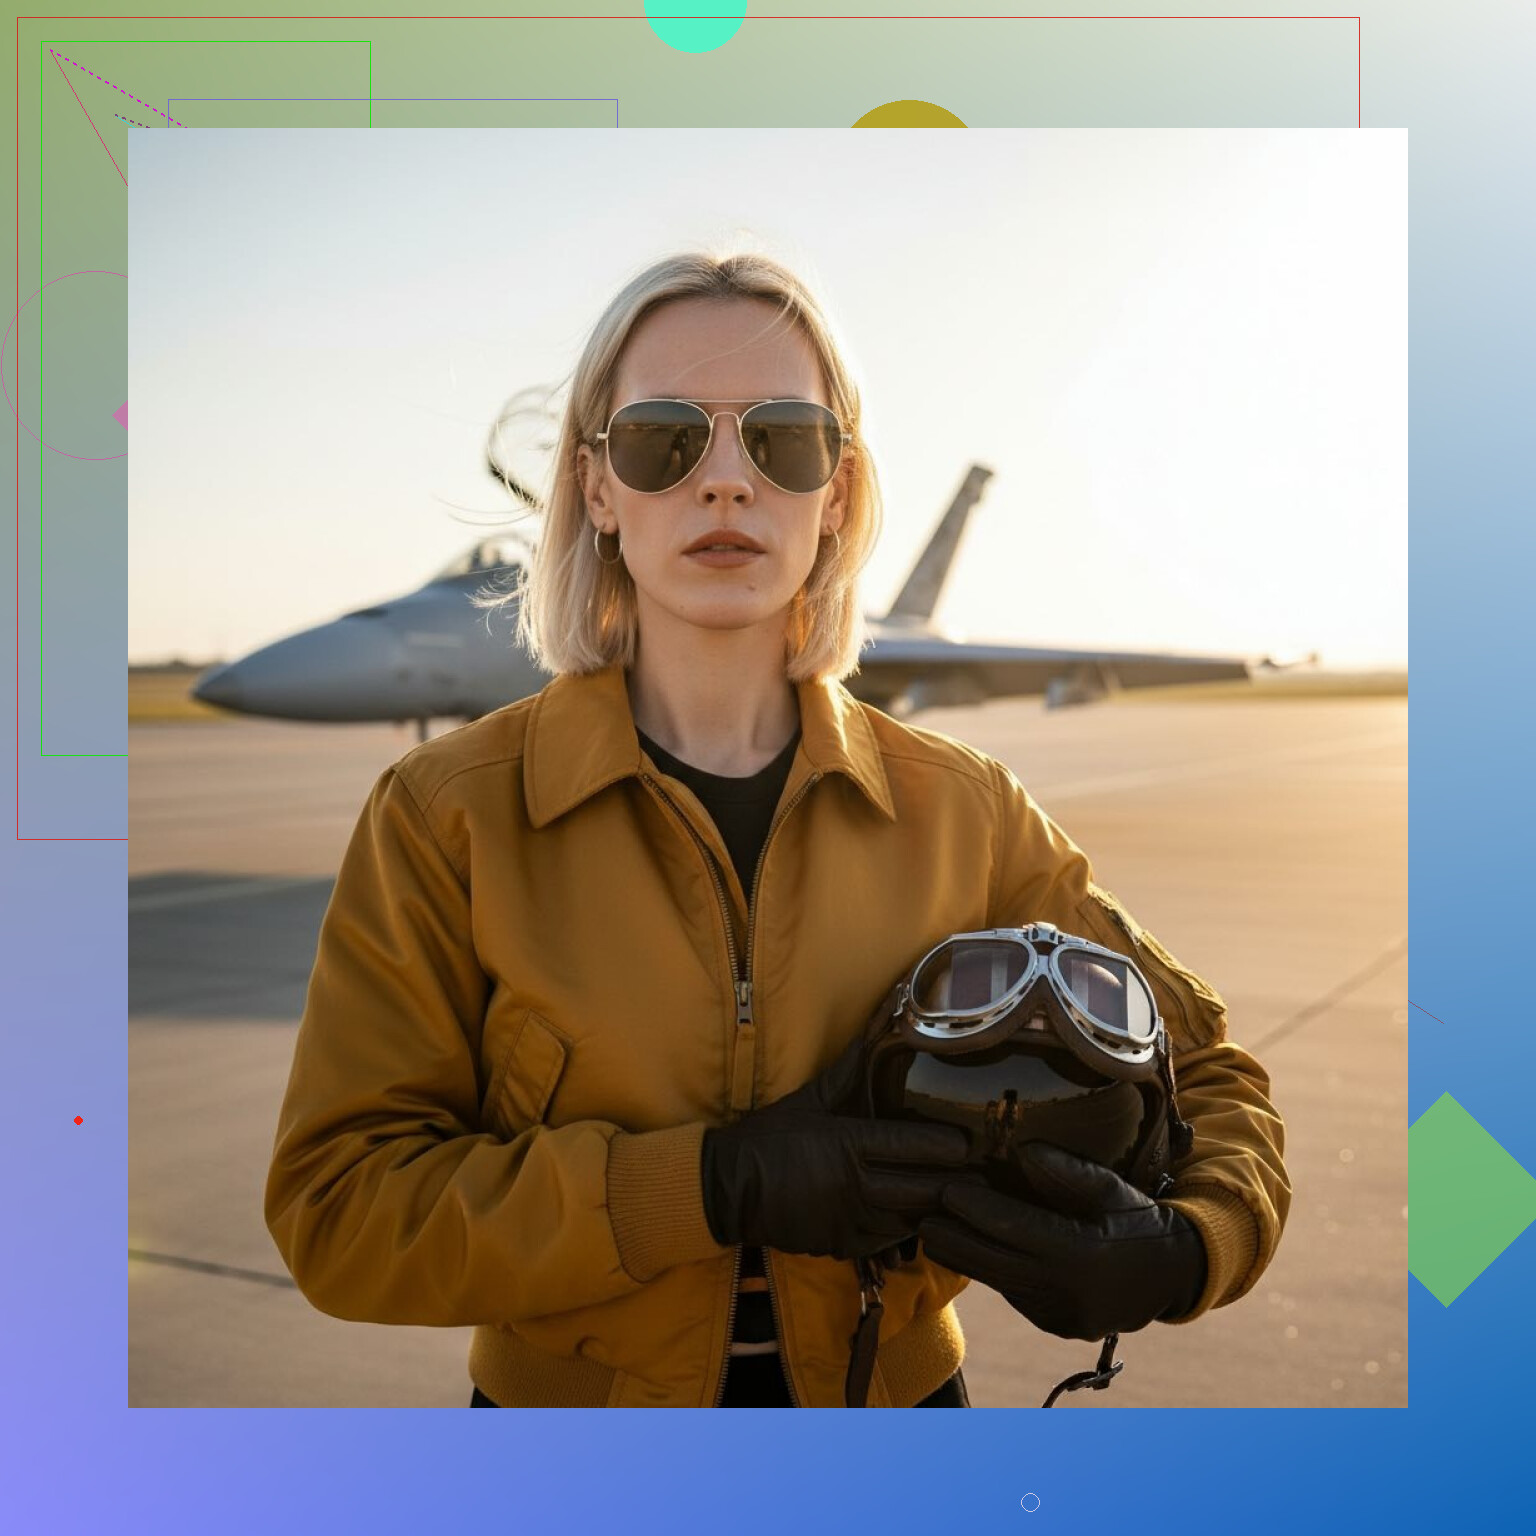
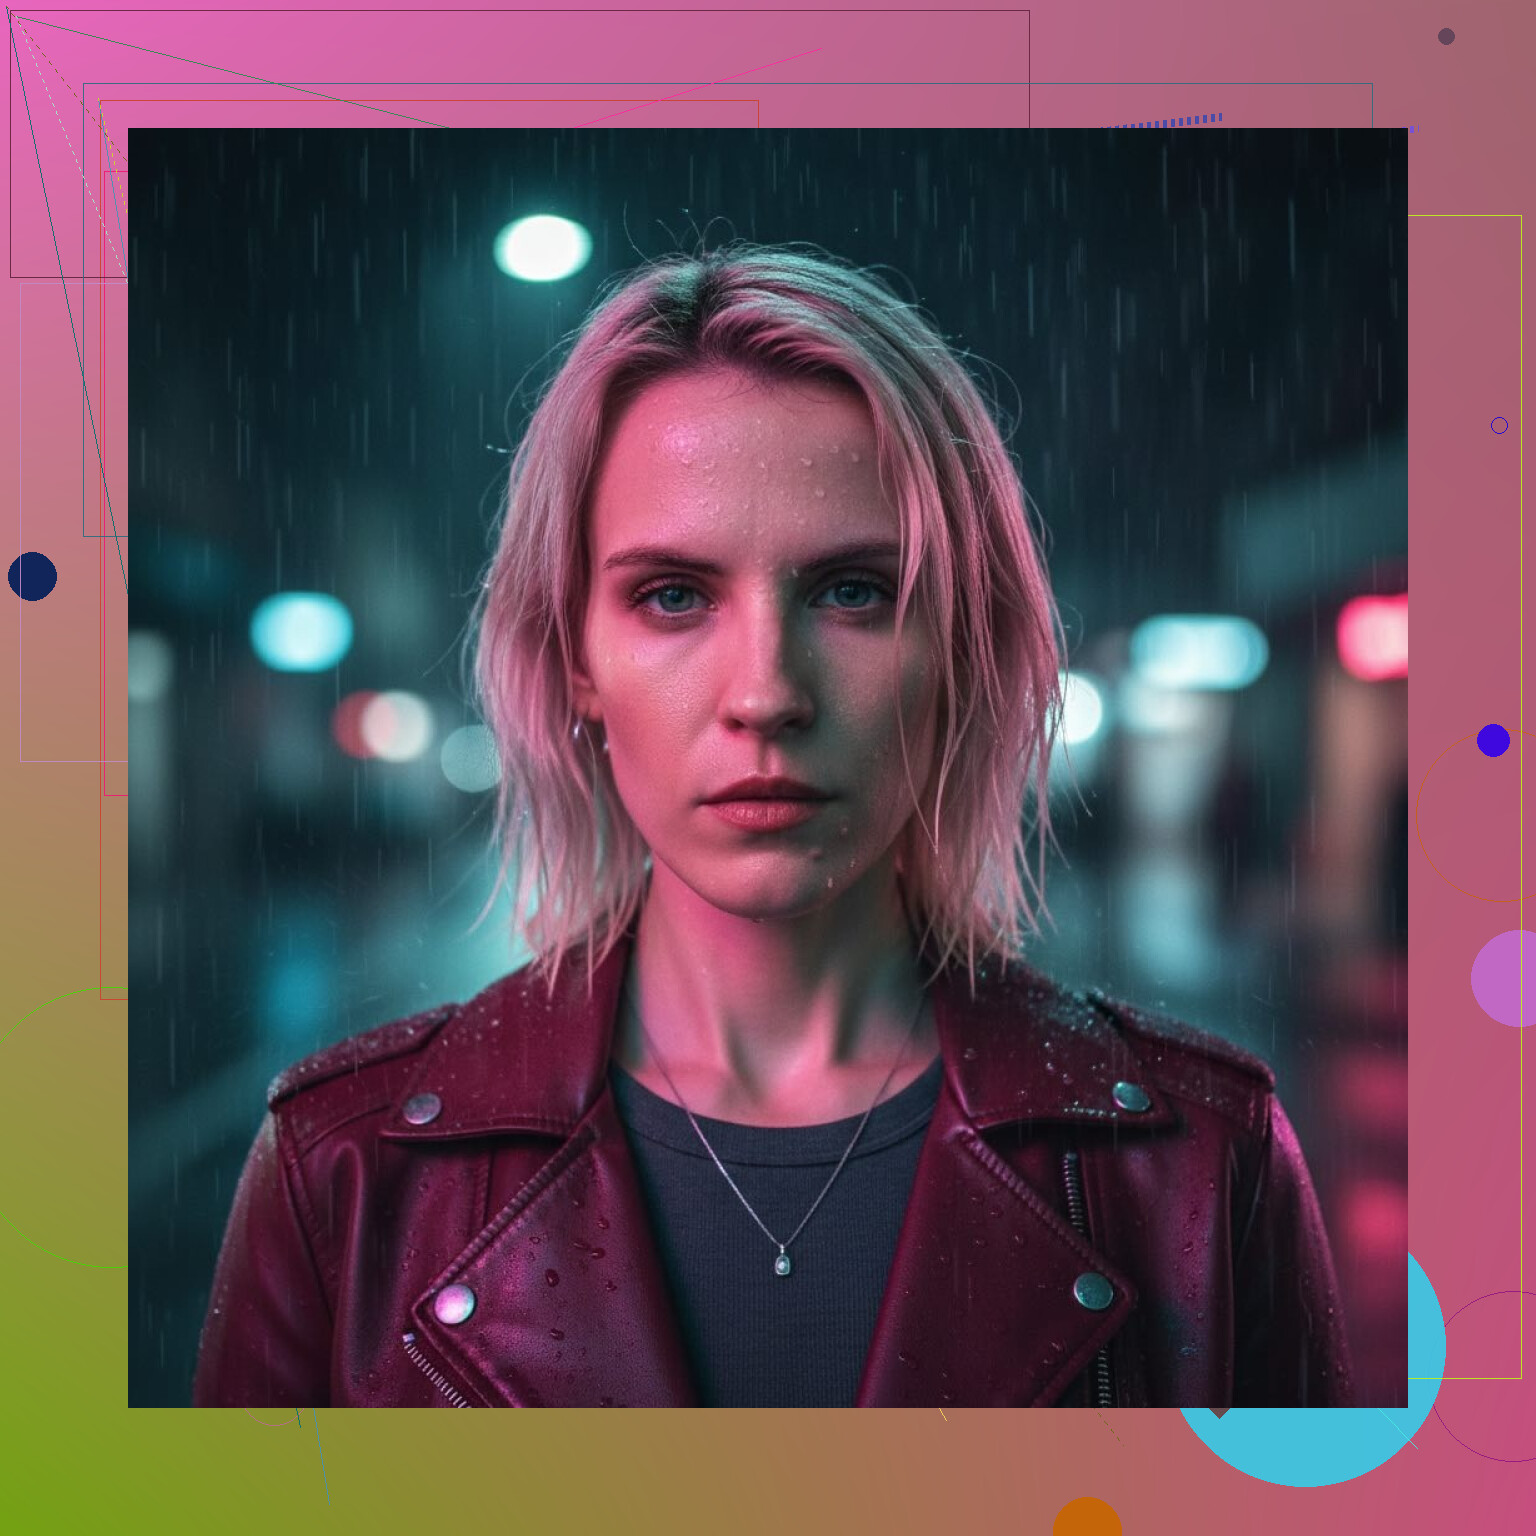
The main thing I noticed:
• Expression stays believable.
• Head shape does not warp.
• Ears stay in place, which some AI tools mess up if you wear hair down or glasses.
• Background and clothing styling change a lot, but your identity stays consistent.
You do not need studio lighting for the input shots, but if you care about detail, here is what helped me:
• Clean, front-facing angles. Avoid extreme side profiles for training.
• Different lighting conditions across selfies, not all from one spot.
• Neutral background, so the app can focus on your face.
App link from the original text:
MoMo – more “art,” less “headshot”
MoMo AI is the other app I tested after someone in a Discord said it was good for fantasy portraits.
MoMo leans hard into stylization. You get:
• Dramatic lighting that looks almost painted sometimes.
• Fantasy vibes, glows, surreal colors.
• Strong compositions where the background, props, and mood are doing a lot of the work.
It is fun, but on my photos, the results felt less like “me in a movie” and more like “an illustration loosely based on me.” The face structure shifted a bit. My jawline changed in some outputs, eyes got larger, skin got too smooth. That might be what you want if you are going for stylized or anime-adjacent portraits, but it stopped being a headshot in the strict sense.
I would put it this way from what I saw:
• MoMo is better for bold, artistic portraits, fantasy posters, dramatic character art.
• Eltima AI Headshot Generator is better when you care about realism and facial accuracy, and you still want that cinema vibe.
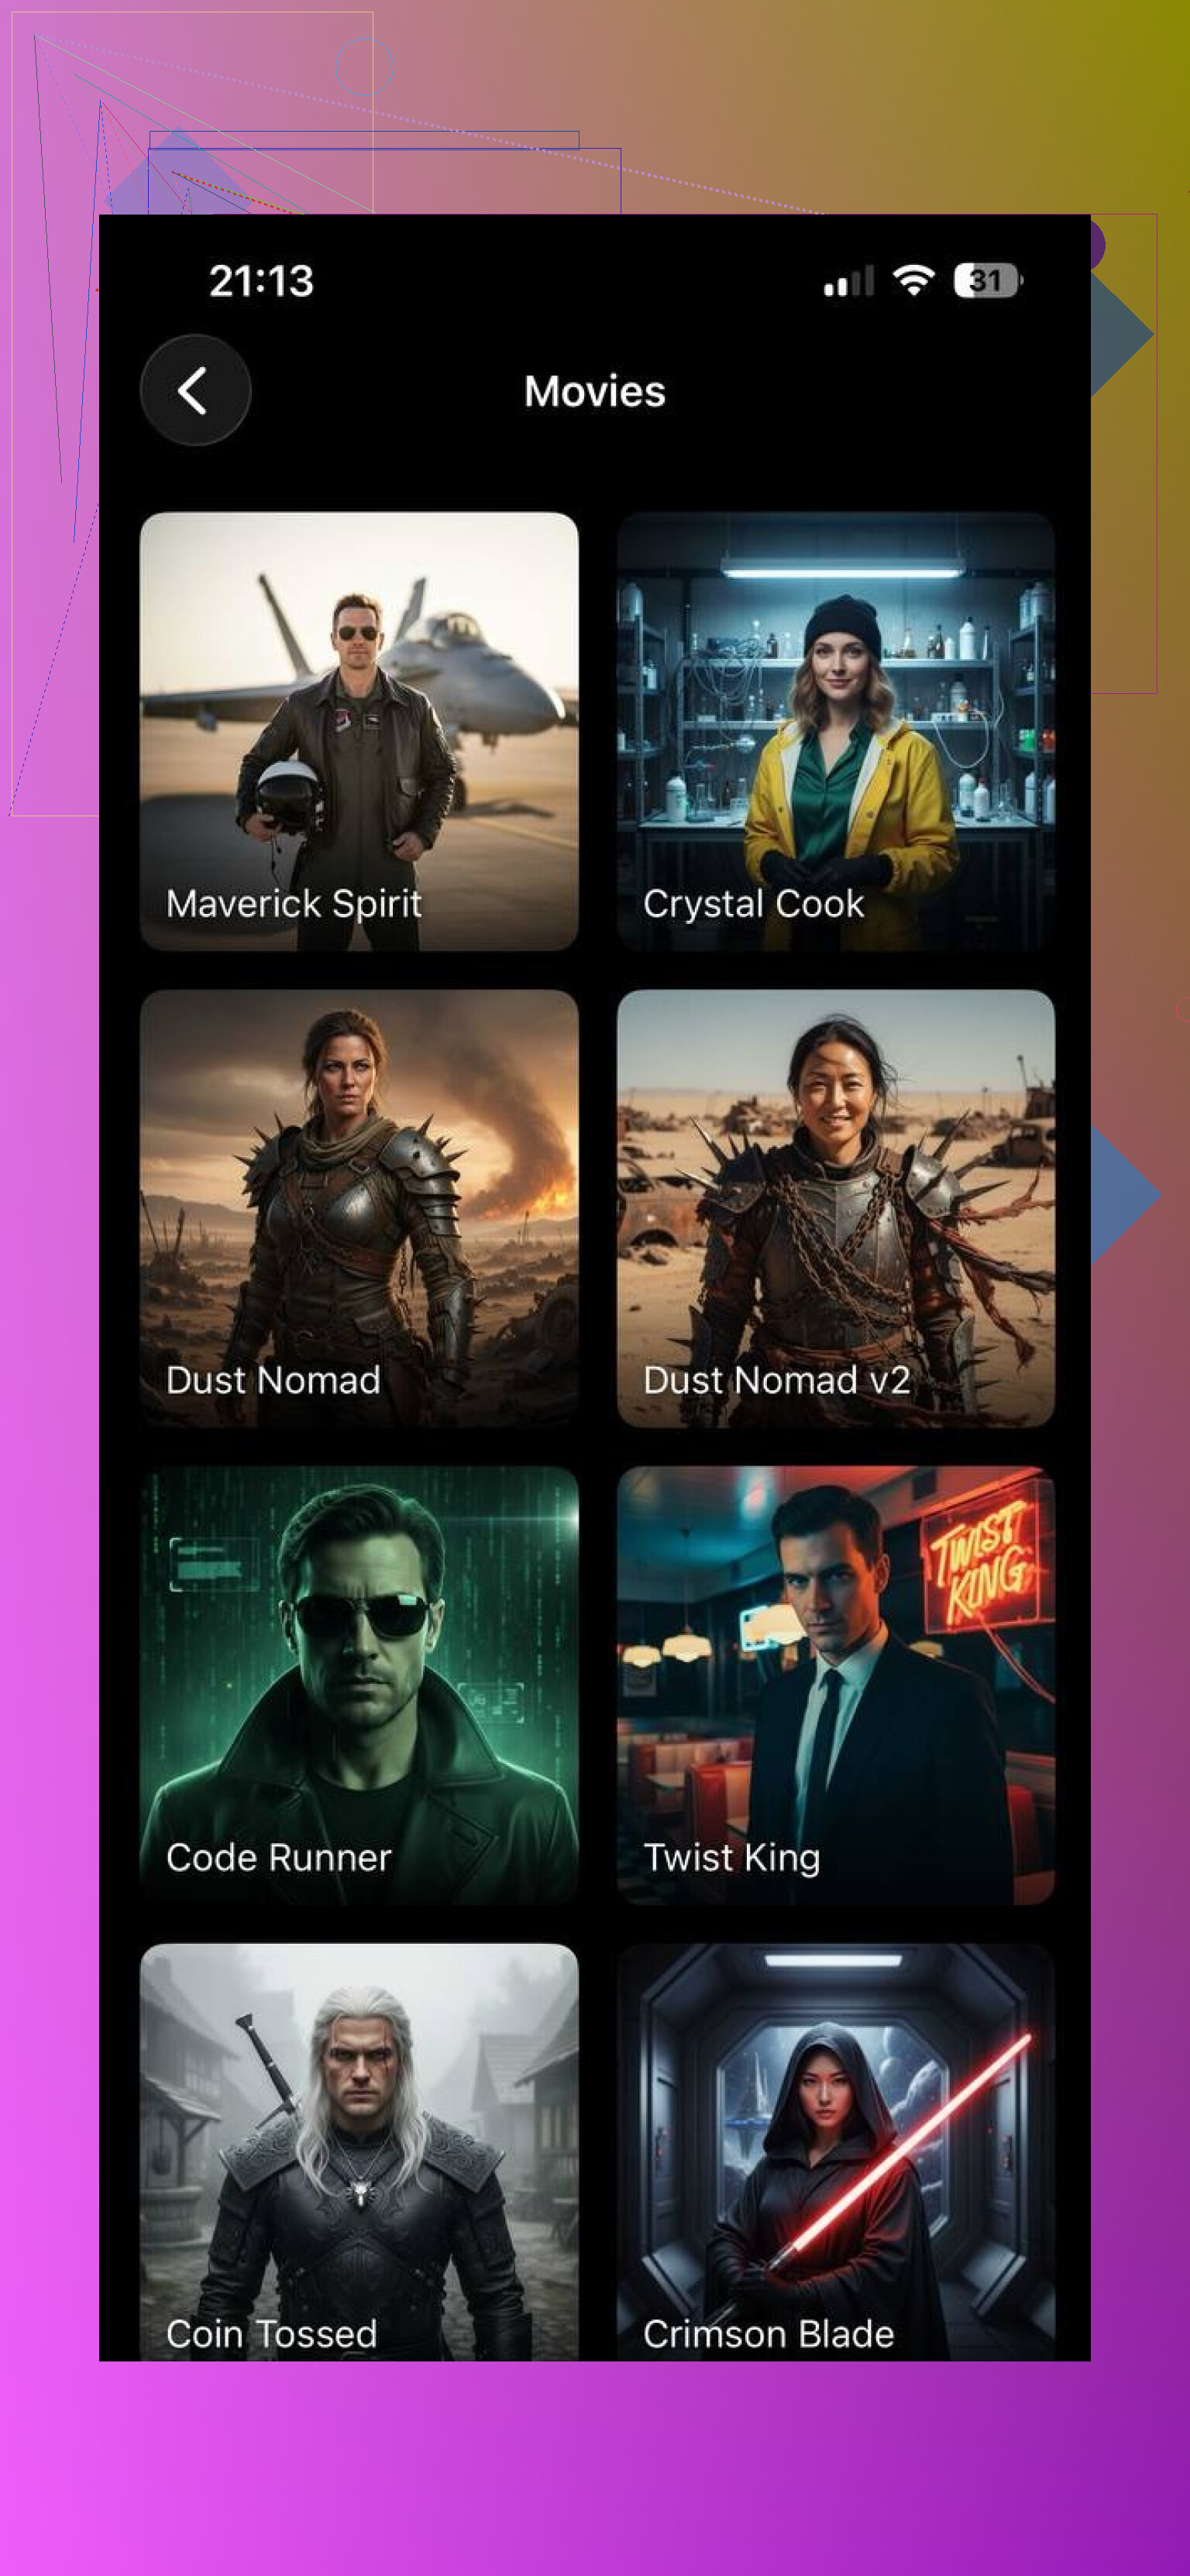
The original post also had this image above, so leaving it here as is:
Where this is useful in real life
Once you have a batch of decent AI headshots, they end up solving small problems you do not think about before:
• LinkedIn or portfolio photos when you do not have recent professional shots.
• A consistent set of profile photos across platforms, in the same visual style.
• Placeholder “character” art for blogs, games, or stories, based on your own face.
• Marketing pages if you are a solo dev or freelancer and want a non-cringe hero image.
For myself, I used an Eltima AI Headshot Generator noir-style shot for a GitHub profile and a softer atmospheric one for Telegram. People reacted more to those than to the usual “phone in mirror” images I had.
Which one I would pick for “movie character” looks
If you’re aiming for that movie character aesthetic — the kind where it feels like a frame from a film, not just a styled portrait — Eltima AI Headshot Generator naturally fits that direction.
Eltima AI Headshot Generator focuses on cinematic realism. The lighting, color tones, and facial structure stay grounded, so the result feels like a real person captured in a movie scene, not a digitally pushed concept. Your face stays recognizably yours, just placed into a stronger, more intentional visual narrative.
MoMo can absolutely work for creative and expressive looks, especially when you want to lean into mood or stylization. But if the goal is a movie still rather than a concept poster, Eltima’s approach feels more controlled and believable.
3 Likes
Short answer for what you want, cosplay + “movie still” profile pics: yes, but with limits.
Where I slightly disagree with @mikeappsreviewer is on how plug‑and‑play this feels. The tools are good, but you still need to “direct” them a bit if you want a specific character vibe, not only “cinematic person with a face”.
Stuff that helps you get closer to a convincing movie character:
-
Lock in a clear character concept
Not “sci‑fi” or “fantasy”.
Use tight prompts like:
• “low key cyberpunk hacker, neon rim light, rain on window”
• “gritty detective, 1970s, tungsten office lamp, cigarette smoke”
• “space pilot, slightly dirty flight suit, metal cockpit, depth of field” -
Reference real films
Pick 3 to 5 frames from one movie.
Look at:
• Focal length style (tight close up vs half body)
• Light direction
• Color palette
Mention movie and lighting in the prompt:
• “framed like a 50mm close up in a thriller, cool shadows, warm key light from the side” -
Help the model with your input photos
For cosplay this matters more than in his review.
• Wear at least a rough version of hair and makeup you want
• Use a top that fits the vibe, even if AI replaces it
• Match expression to the role, e.g. soft, stoic, angry
If you feed only casual selfies, you often get “you, but generic cinematic person”. -
Use the right type of tool
Rough guide from a lot of tests:
• Photo‑real headshot tools (like Eltima) keep your bone structure and identity. Good for “me if I was cast in a film”.
• Stylized tools (like MoMo) help when you want poster art or exaggerated cosplay, not strict realism.
You sound like you want a mix, so try:
• Generate base from a realistic headshot tool.
• Run a light stylistic pass in a more artistic app, but keep strength low so your face does not morph too much. -
Fix the “off” parts in a cheap way
AI often fails on: hands, collars, jewelry, some hair.
Quick patch workflow that works better than regenerating 20 times:
• Export at max resolution.
• Use a mobile editor like Snapseed or Lightroom for: contrast, crop, small color tweaks.
• Use a retouch app to fix obvious artifacts around ears, hairline or glasses.
Spend 5 minutes per image. That last 10 percent of cleanup matters more than rerolling endlessly. -
For social avatars vs cosplay posters
• Social avatar: tighter crop, less wild lighting, keep your real eye color, avoid oversharp skin. You want “oh, that is you in a scene”.
• Cosplay: looser framing, include some costume, more dramatic light, push color a bit harder. -
When it still looks “off”
Common reasons:
• Style noise: you mix too many genres in one prompt. Stick to one.
• Face drift: model over‑smooths or “beautifies” you. Dial down stylization or try another app.
• Wrong focal feeling: extreme wide looks caricatured. Ask for portrait lens look, like “50mm or 85mm closeup”.
If your current outputs look cool but not like what you had in mind, you likely need:
• Better input photos in character
• Stricter prompts tied to a single movie style
• Small manual touchups at the end
Once you do that, the difference between “AI art of a stranger” and “me as a believable movie character” gets much smaller.
Short version: yes, convincing is possible, but not “perfect casting” out of the box. Right now you’re probably hitting the ceiling of the tool, not the idea.
@mikeappsreviewer and @nachtdromer covered the “which app” and “how to direct prompts” angle pretty well. I’ll push on a few things they didn’t, and disagree a bit on one point: even the best tools are still bad at consistent character identity across a whole set, which matters a lot for cosplay and social profiles.
A few angles to think about that might explain why your results feel “almost there”:
-
Face vs character problem
Current headshot AIs are trained to make “good looking portraits,” not “faithful character portrayals.”
So they auto-inject:- Subtle beautification
- Trendy grading (teal/orange, warm skin, etc.)
- Generic “cinematic” vibes
That’s great for LinkedIn, less great for “me as a specific movie archetype.” To fight that, lean away from generic tags like “cinematic, dramatic, movie still” and describe role and attitude instead: tired, paranoid, hopeful, ruthless, etc.
-
Expression is under-rated
Both of them focused on lighting and style packs. I’d argue expression is 70% of the “convincing character” feeling.
Try sets where you’re:- Actually frowning, squinting, or smirking in the input
- Slightly off-center, like someone just called your name
- Not smiling straight at camera unless you want Marvel-poster energy
If the base selfies are “hi I’m holding my phone,” AI will nearly always give you “generic cinematic human” instead of “recognizable character.”
-
One character per training set
They suggested being deliberate about prompts; I’d also be deliberate about data.
If you want “space captain you” and “noir detective you,” don’t cram both into the same trained model. Train or fine-tune separate runs:- One model: hair/style close to the detective look
- One model: closer to your sci fi / cosplay look
Mixing very different looks in training often gives mushy, identity-drifty results that feel off compared to what you had in mind.
-
Background and context carry more weight than you think
You can get 60–70% of the movie feel from context even if the face output is only “pretty decent”:- Tight crop on your face for thriller / drama
- Over-the-shoulder / ~half body for action or sci fi
- Strong foreground objects: window bars, cockpit frames, door frames, rain on glass
A lot of AI headshot tools let you tweak crop; don’t sleep on that. A mid shot with a boring, soft blur will never feel like a movie, no matter how good the skin texture is.
-
Accept that some genres look worse than others
The tools you’re using are usually best at:- Drama / thriller / corporate / tech founder / indie film looks
They tend to struggle more with: - High camp, superhero suits, extreme fantasy armor, exact copies of famous costumes
For cosplay, that means: - “Realistic reinterpretation of the character” works better than “screen accurate copy”
So expect “me if this character existed in a Netflix adaptation” instead of “I am literally that movie frame.”
- Drama / thriller / corporate / tech founder / indie film looks
-
Use AI for base, not final
Where I slightly disagree with both earlier replies: I don’t think 5 minutes of tweaking is enough if you’re picky. Those almost-right outputs really come alive if you:- Take the best 1 or 2 images
- Bring them into a brush-based editor (even a simple mobile one)
- Manually:
- Darken / brighten just the eyes
- Punch contrast on the key side of the face
- Desaturate or tint shadows to match the film you’re mimicking
That tiny bit of manual “DP work” on top of the AI result can be the difference between “AI portrait” and “this really looks like a frame from something.”
-
When you should just do a low-effort real shoot
If you need:- One hero shot for a cosplay poster
- Or a single main social avatar
It might actually be faster to: - Throw on the partial cosplay
- Stand near a window or a cheap LED panel
- Shoot 20 pics on a phone
- Then feed those into the “realistic” AI as source, so it’s enhancing an already-character-ish look instead of inventing everything.
Hybrid workflow > pure AI in a lot of “convincing character” use cases.
So: AI can absolutely get you into that “convincing movie character” range, especially for avatars and concept art. To push from “cool but generic” into “oh wow that’s actually you as a character,” focus less on switching apps and more on:
- Expression and pose in your source pics
- One clear character per model / batch
- Strong contextual cues (crop, background, foreground objects)
- A bit more manual finishing than feels “fair” for an AI tool
If you’re up for sharing what vibe you’re targeting (genre + one example movie), people here can probably help you dial in much more specific settings / prompts.